Make a one-sheet mini memory book
Keep a small moment in eight pages: a cover, six inside pages and a back cover. The two paper formats use the same planned 65 × 90 mm book size.
Before you begin
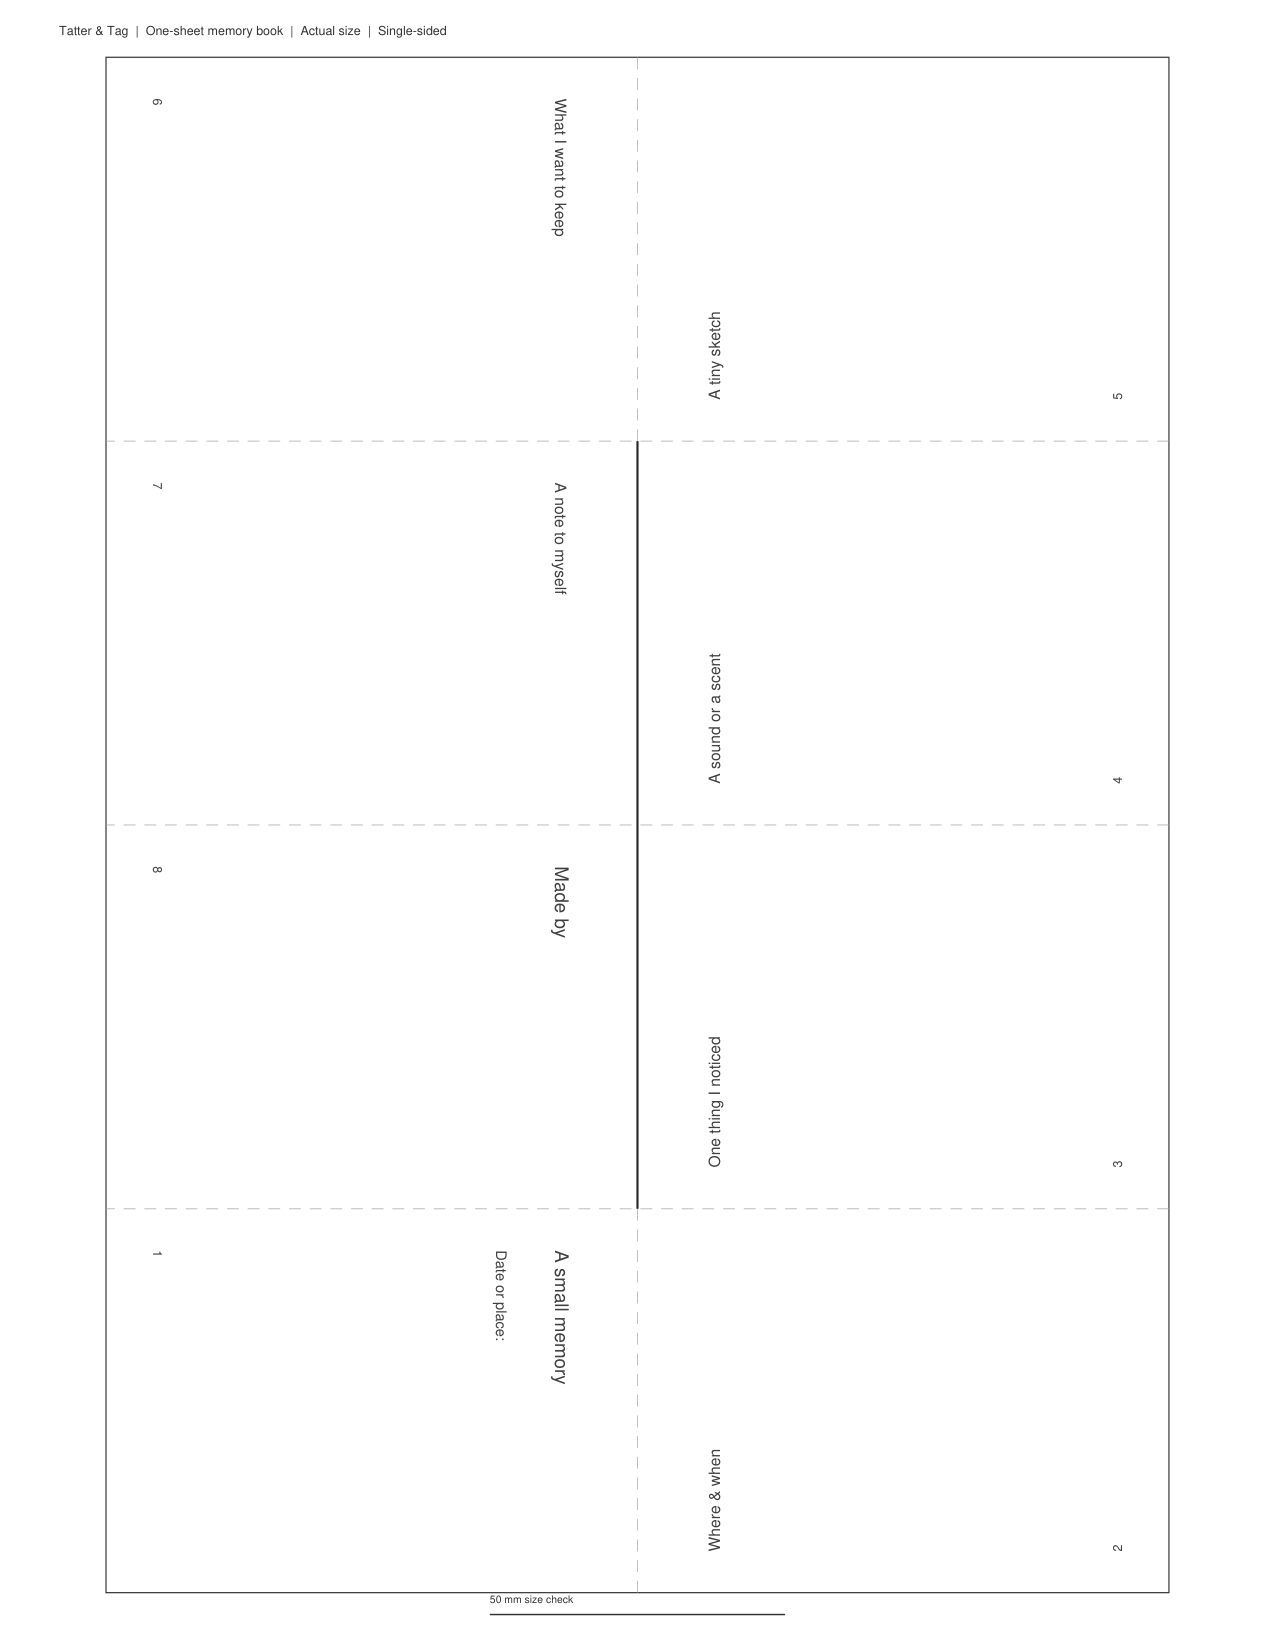
Use one sheet of ordinary printer paper, scissors and a ruler. A blunt scoring tool is optional. You do not need glue, staples or another printable.
Print single-sided at 100% / Actual size. Measure the 50 mm ruler before cutting. Heavier card can make the center bulky; try ordinary paper first.
Digital page order and dimensions checked. This template has not yet been physically folded or print-tested. The diagrams explain geometry and are not photographs of a tested model.
Get the one-sheet template
1 sheet · Numbered mini-book template PDF · Choose your paper size
Choose paper sizePrint at 100% / Actual size. Single-sided.
For personal journals and handmade gifts. No resale or redistribution. Use & credits.
Report a file issueDirect paper-size downloads
Choose the paper loaded in your printer. These links also work if page scripts cannot load.
Download A4 PDF · 1 page · 2 KBDownload Letter PDF · 1 page · 2 KBTrim first, then make the creases
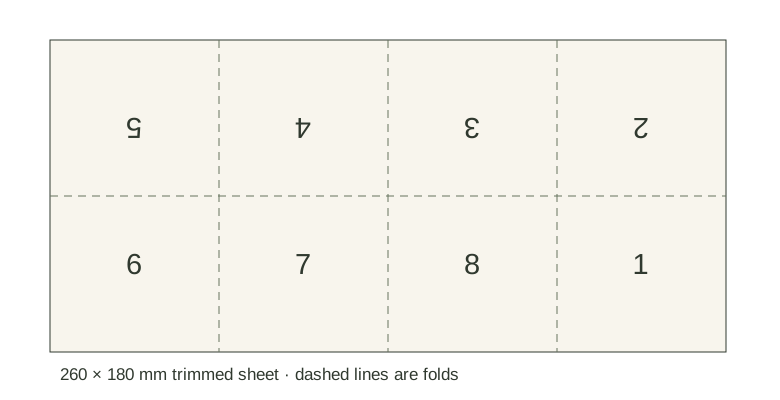
Cut the outer solid rectangle only. It measures 260 × 180 mm in landscape. Fold and reopen at the three dashed vertical lines and the horizontal middle line, creating eight 65 × 90 mm panels. Match edges carefully instead of compensating by cutting into a panel.
Make one central slit
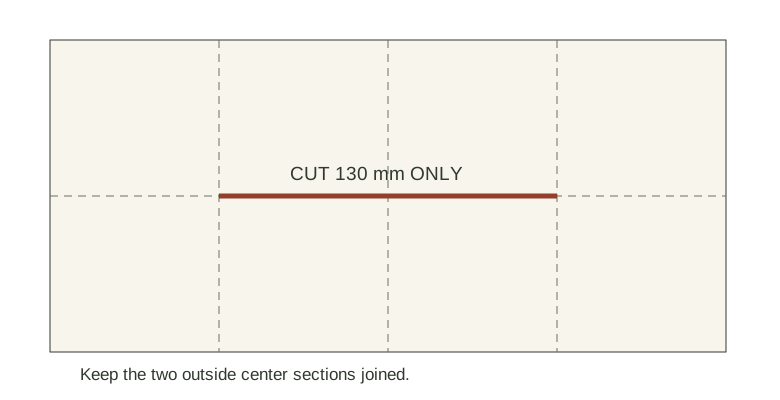
With the sheet fully open, cut the bold horizontal segment between the first and third vertical creases. The slit is 130 mm long. Do not cut the outside horizontal sections or any of the vertical fold lines. If you prefer scissors, fold the sheet at its middle vertical crease and cut from that folded edge to the next vertical crease; unfold to reveal the slit.
Open the slit, then bring the pages together
Fold lengthwise along the horizontal middle, with printing outside and blank faces touching. Hold the two short ends and push them toward one another. The slit opens into a diamond, then the four folded sections meet in a cross. Bring the sections around until page 1 is the front cover and page 8 is behind it.
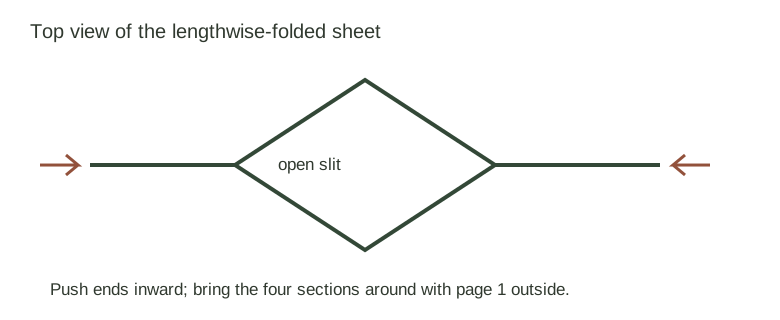
This is a top-view fold schematic, not a scale model. Open gently; forcing a misaligned crease can tear the end of the slit.
Check the sequence before adding your story
Turn the pages: 1 → 2 → 3 → 4 → 5 → 6 → 7 → 8, all upright. The middle six pages leave room for a place, a detail, a sound or scent, a sketch and a short note. Keep bulky collage away from the spine so the small book can close.
If the order is wrong, reopen to the lengthwise fold and rearrange the sections; do not cut additional lines. If everything is too small, reprint at Actual size rather than Fit. If the paper tears, make a fresh scrap-paper trial before using thicker paper.
Choose your next small make
For a flat journal page, try a collage prompt. For a longer message, use full-page low-ink letter paper. No fit with an existing pocket or envelope has been verified.
The single-sheet folding method is a standard mini-zine construction. For another explanation, see artist Marek Bennett’s one-sheet mini-comic workshop. This site's template, prompts and diagrams are newly made.